Import an MVR plot from Vectorworks
Sheet G-104 · from the in-app Guide · updated 2026-07-03
The short version
- Drop any .mvr export on the MVR / Patch tab — fixture schedule, DMX patch, universes by position.
- Patch conflicts (overlaps, over-512 spill) are flagged, and node universes are cross-checked.
- Parsed offline; the summary saves with the show and can add an export sheet.
01Pull the plot, don't retype it
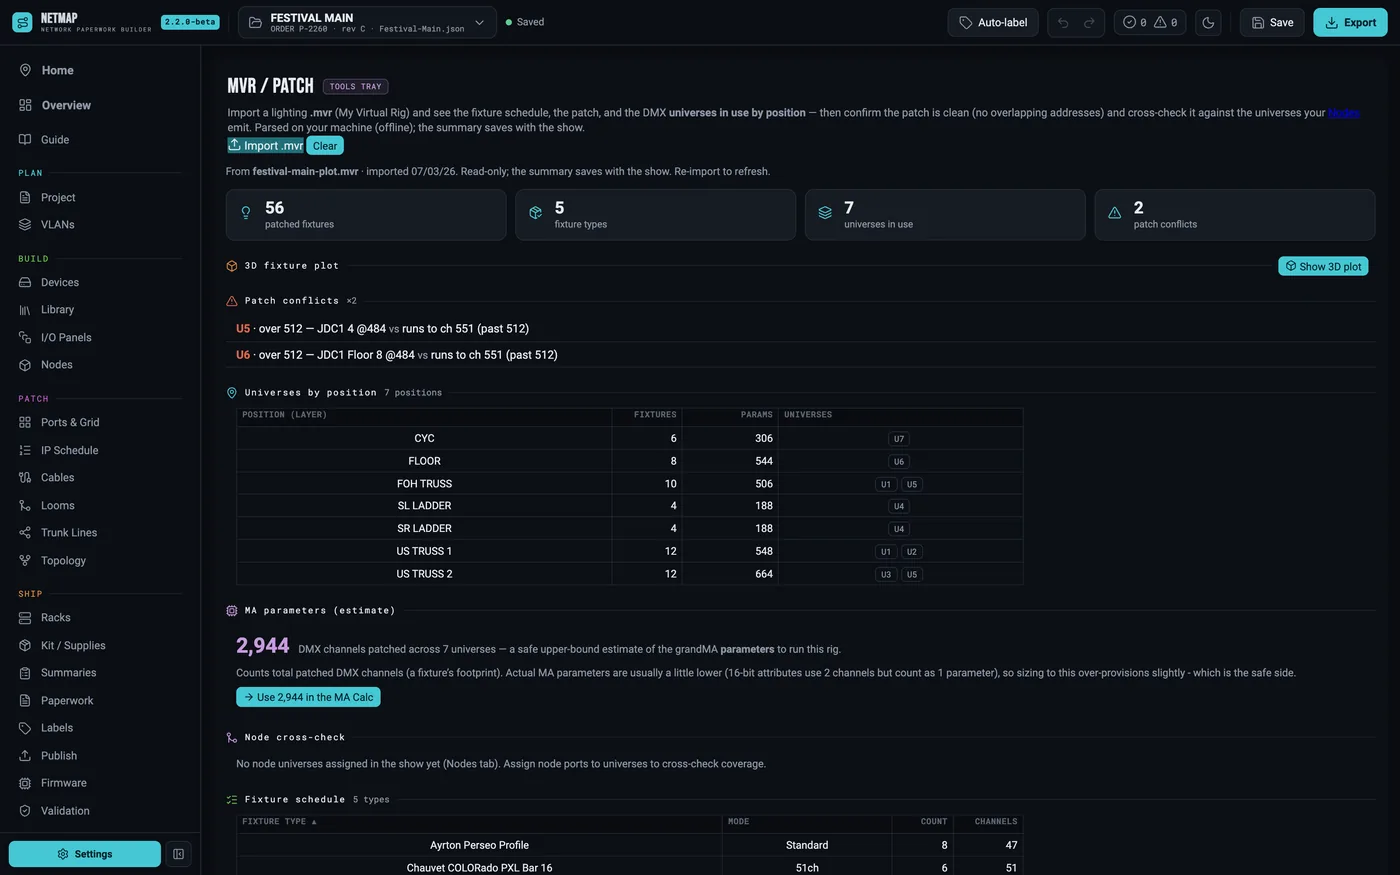
The lighting department already built the rig once — in Vectorworks, or in the console. Export an .mvr from either and import it on the MVR / Patch tab. netmap parses it locally (nothing uploads) and lays out the fixture schedule, the DMX patch, and which universes are used at each position. That last table is the one the network build actually needs: it says what the nodes at each position must emit.
02Catch patch conflicts at the desk
The import runs a conflict check as it lands: address overlaps, fixtures spilling past channel 512, doubled universes. It also cross-checks the universes your Nodes are set to output against what the plot expects — the mismatch between the lighting patch and the network paperwork is exactly the mistake that otherwise surfaces at load-in.
03Patch an EN12 node
With the universe map in hand, patch the node side:
- On Devices, add the Obsidian EN12 (or pull it from your Library) and set its Type to Node.
- The node build button opens its port builder: protocol (sACN / ArtNet), port count, node IP.
- Type each port's universe, or apply a Start + Step across a range — 12 ports in two clicks.
- Check the Nodes tab: every node, its IP and per-port universes in one grid, which prints as the Node Universes sheet.
If the EN12's outputs don't cover what the MVR says a position needs, the cross-check flags it while the fix is still free.
04Footprints and the 3D plot
Optionally verify or fill fixture footprints from GDTF Share (your account, set in Settings), push the total parameter count into the MA Calc, and render a 3D fixture plot of the rig next to your racks.
MVR Import is a $9/mo add-on · included free in Studio · see the rate card